Install the connector

Watch the video, or follow the instructions below to install the Power BI Connector.

To install the connector:

  1. Contact your account representative to enable SQL connection features on your account.
  2. Ensure Power BI is installed and is up to date.
  3. Find the Windows ODBC package and the Power BI Connector at this link.

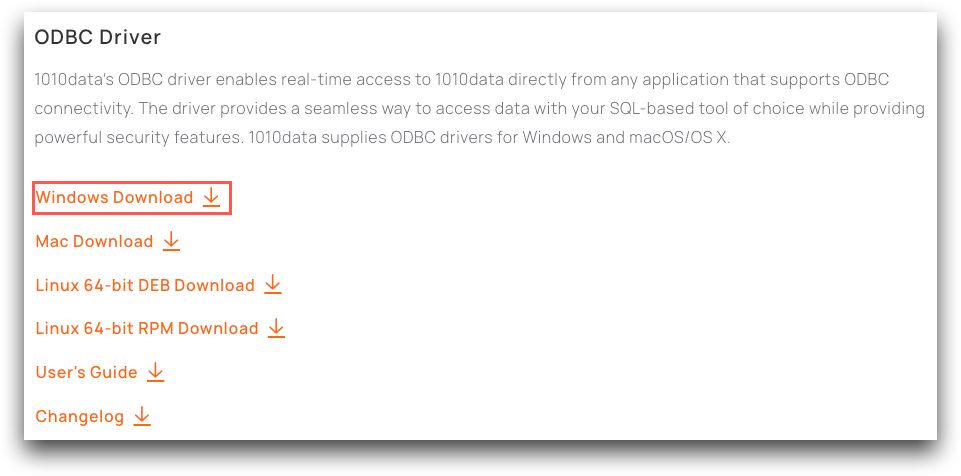
  4. Download both the ODBC executable and the Power BI Connector file.
    Both files are now in your downloads directory.

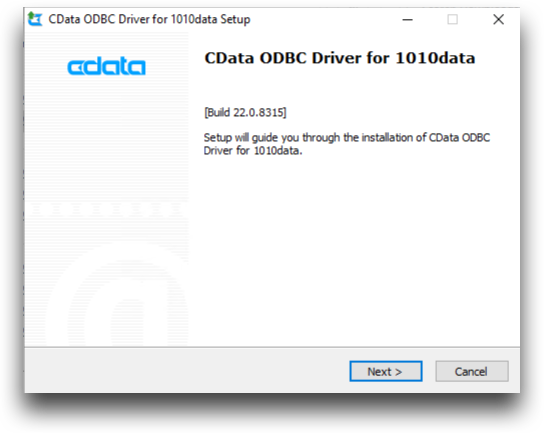
  5. Run the ODBC Driver Setup wizard.
    The ODBC Driver for 1010data Setup screen appears.

  6. Follow the prompts in the ODBC Driver Setup wizard to install and configure the ODBC Driver.
  7. When you get to the Installation completed successfully dialog, make sure Configure ODBC Data Source is selected and click Finish.
    The DSN Configuration screen appears.

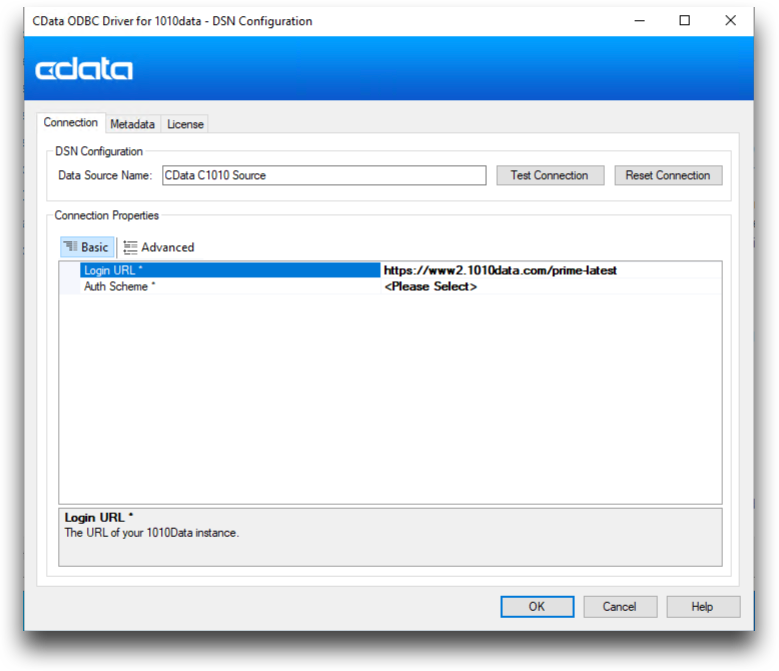
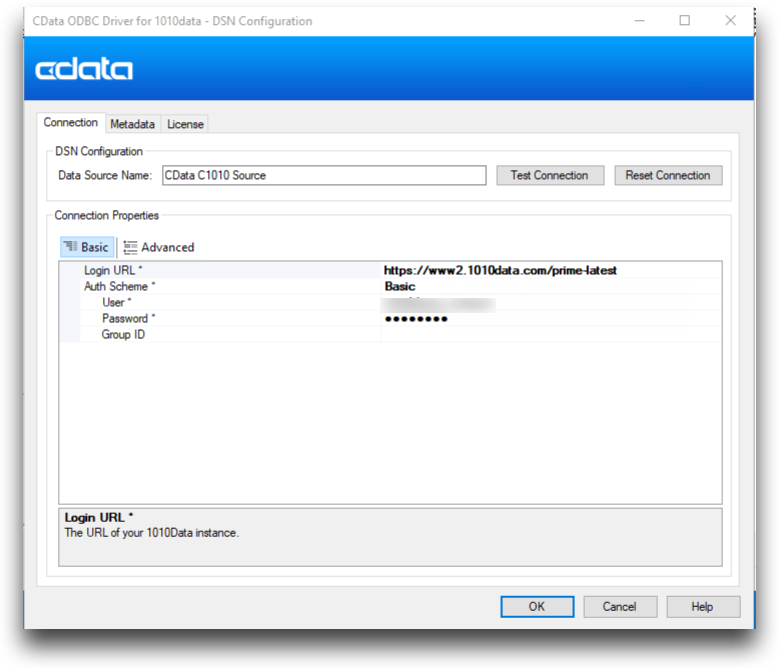
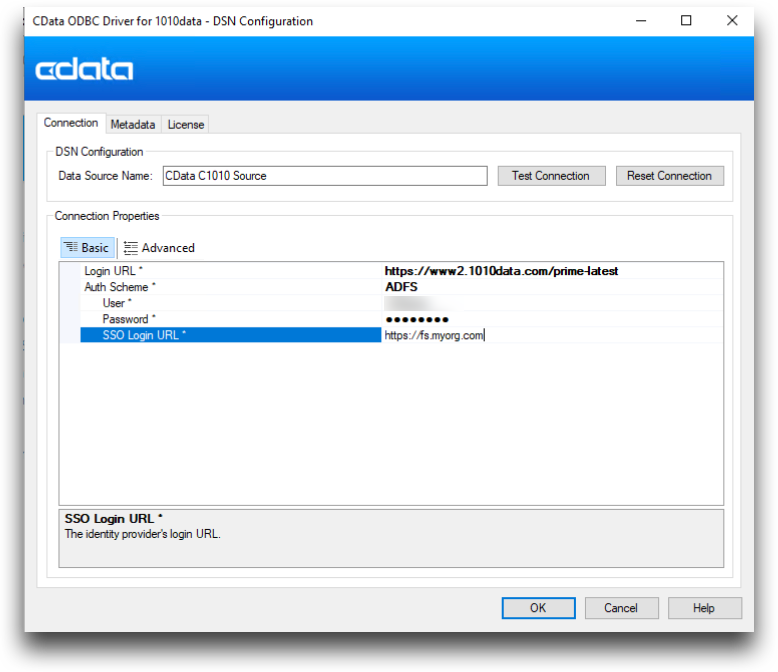
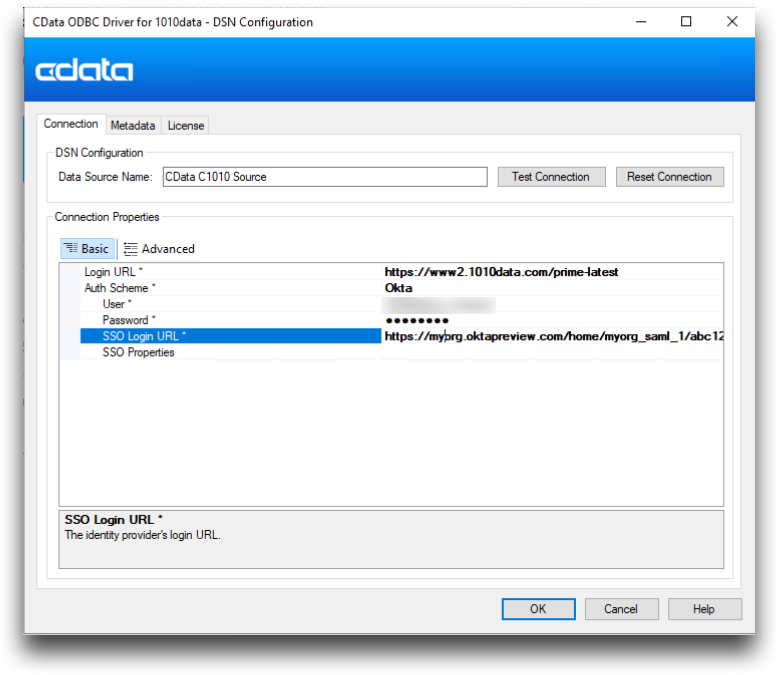
  8. In the DSN Configuration screen, enter the following information:
    1. Data Source Name: Name your connection (you will need to remember this for later). A DSN is the name that applications use to request a connection to a data source.
      You can also use the default data source name (DSN): CData C1010 Source.
    2. Login URL: Enter the URL of the 1010data environment you are accessing, including the version (such as /prime-latest). The Power BI connector is compatible with the 1010data Insights Platform V15 and above.
      Note: Any version of the 1010data Insights Platform after V15 will work. However, as a best practice, we recommend using prime-latest as the version.
    3. Auth Scheme: Select a authorization scheme for your login from the drop-down list.
      Note: Your organization may require the use of single sign-on (SSO) to authenticate to 1010data, such as Okta or ADFS (Active Directory). In that case, select Okta or ADFS. See additional steps below.
    4. User: Enter your user name.
      Note: If you are using SSO to log in, the user name is your SSO user name for your SSO provider.
      Note: If you are using a SAM pool to log in, the user name is the name of the owner of the SAM pool, not your own user name.
    5. Password: Enter your password.
      Note: If you are using SSO to log in, the password is your SSO password for your SSO provider.
      Note: If you are using a SAM pool to log in, the password is the password of the owner of the SAM pool, not your own password.
    6. Group ID (Optional): Enter the pool group ID for your SAM pool.
    7. SSO Login URL (Optional): Enter the URL for accessing the SSO portal for your provider.
      ADFS
      The URL must be the base URL of your ADFS instance, such as https://fs.myorg.com.
      OKTA
      The URL entered here must be the Okta application embed link. This information is available in the Embed Link field within the application's settings in Okta. Most likely, you will need to contact your Okta administrator for the URL to enter here.

      Okta administrators can refer to the following: Copy the embed link for an app integration.

    8. SSO Properties (Optional): Enter SSO properties. This is not required for ADFS. Okta allows two optional SSO properties.
      Domain
      The Okta domain you are signing in with, if it is different from the SSO Login URL.
      APIToken
      Your Okta API token. In most cases, it is unnecessary.

      See SSO Properties in the Power BI Connector Reference Manual for more details.

    Basic connection:

    ADFS connection:

    Okta connection:

  9. Click Test Connection.
    You should see the following dialog:

  10. Click OK in this dialog and click OK again to exit the DSN Configuration screen.
    Note: If you need to make further changes to your DSN Configuration screen in the future, run the program ConfigureODBC in the directory C:\Program Files\Cdata\CData ODBC Driver for 1010data.
  11. Navigate to your C:\Users\[USERNAME]\Documents directory.
    Note: The Documents folder must be on your local machine, not a shared drive Documents folder.
  12. Create a folder called Power BI Desktop if it does not already exist.
  13. Within the Power BI Desktop folder, create a folder called Custom Connectors if it does not already exist.
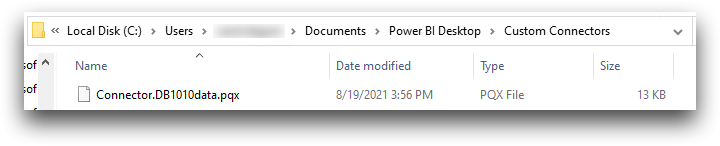
  14. Move the .pqx file you downloaded to the folder C:\Users\[USERNAME]\Documents\Power BI Desktop\Custom Connectors.
You can now connect to Power BI using the instructions in Connect to 1010data from Power BI.