
Configuring a QuickApp for render targets
This recipe demonstrates how to create an interface that gives the end user different options for downloading data grids and charts from a QuickApp.
Difficulty

Objective
You want to give the end user the option to export the information created in your QuickApp to an
Excel worksheet or a CSV file based on the user's inputs. These inputs specify which widgets
the user would like to include in the export, the name of the file that is to be downloaded,
and if the user desires an Excel output, whether or not the information should be exported
to one worksheet or multiple worksheets. By creating additional widgets where
class_="button" and type_="render", you can specify
attributes to give the end user control of what information is downloaded and where it is
saved.
Solution
<dynamic startdate="20150101" enddate="20160101" storenum="19"
deptnum="36" groupnum="468" target_selection="xlsx" widget_selection=""
downloadname="" onesheet="" manysheets="0" graph="1" grid="1" chart="1">
  <do onchange_="@widget_selection">
    <if test="{contains(@widget_selection;'retail_data')=1}">
      <then>
        <set grid="1"/>
      </then>
      <else>
        <set grid="0"/>
      </else>
    </if>
    <if test="{contains(@widget_selection;'sales_graph')=1}">
      <then>
        <set graph="1"/>
      </then>
      <else>
        <set graph="0"/>
      </else>
    </if>
    <if test="{contains(@widget_selection;'store_perf')=1}">
      <then>
        <set chart="1"/>
      </then>
      <else>
        <set chart="0"/>
      </else>
    </if>
    <if test="{@widget_selection=''}">
      <set chart="1"/>
      <set graph="1"/>
      <set grid="1"/>
    </if>
  </do>
  <layout arrange_="h">
    <layout type_="tabpanel">
      <layout label_="Data Grid">
        <widget name="retail_data" class_="grid" require_="{@grid}"
        invmode_="hide" base_="pub.doc.retail.altseg.sales_detail_transid">
          <sel value="between(trans_date;{@startdate};{@enddate})"/>
          <sel value="store={@storenum}"/>
          <sel value="dept={@deptnum}"/>
          <sel value="group={@groupnum}"/>
        </widget>
      </layout>
      <layout label_="Sales Over Time">
        <widget name="sales_graph" class_="graphics" require_="{@graph}"
        invmode_="hide" base_="pub.doc.retail.altseg.sales_detail_transid">
          <sel value="between(trans_date;{@startdate};{@enddate})"/>
          <col name="trans_date" format="type:date4y"/>
          <tabu breaks="trans_date">
            <tcol name="sum_of_sales" source="xsales" fun="sum"/>
          </tabu>
          <colord cols="sum_of_sales,trans_date"/>
          <graphspec>
            <chart type="line" title="Sum of Sales Over Time"
            samples="100000">
              <data x="trans_date" y="sum_of_sales"/>
              <grid hide="1"/>
              <axes xlabel="Date" ylabel="Sum of Sales"/>
              <ticks xrot="45" yrot="0"/>
            </chart>
            <style xaxissize="12" xaxislabelsize="18" yaxissize="12"/>
          </graphspec>
        </widget>
      </layout>
      <layout label_="Store Performace">
        <widget name="store_perf" class_="graphics" require_="{@chart}"
        invmode_="hide" base_="pub.doc.retail.altseg.sales_detail_transid">
          <sel value="between(trans_date;{@startdate};{@enddate})"/>
          <sort col="store" dir="up"/>
          <tabu breaks="store">
            <tcol name="sum_of_sales_by_store" source="xsales" fun="sum"/>
          </tabu>
          <graphspec>
            <chart type="pie">
              <data x="store" y="sum_of_sales_by_store"/>
            </chart>
          </graphspec>
        </widget>
      </layout>
    </layout>
    <layout>
      <widget class_="dropdown" label_="Select a Target"
      value_="@target_selection">
        <table>xlsx,data;Excel,CSV
        </table>
        <transpose/>
      </widget>
      <widget class_="dropdownlist" label_="Select Widgets to Render"
      value_="@widget_selection">
        <if test="{@target_selection='data'}">
          <then>
            <table>retail_data,Data Grid
            </table>
          </then>
          <else>
            <table>retail_data,sales_graph,store_perf;Data Grid,
            Sales Over Time,Store Performance
            </table>
            <transpose/>
          </else>
        </if>
      </widget>
      <widget class_="field" label_="Name of File:" value_="@downloadname"/>
      <widget class_="button" type_="render" target_="{@target_selection}"
      text_="Click to Export on One Sheet" include_="{@widget_selection}"
      filename_="{@downloadname}" require_="{@target_selection='xlsx'}"
      invmode_="hide"/>
      <widget class_="button" type_="render" target_="{@target_selection}"
      text_="Click to Export on Multiple Sheets"
      filename_="{@downloadname}" require_="{@target_selection='xlsx'}"
      invmode_="hide"/>
      <widget class_="button" type_="render" target_="{@target_selection}"
      text_="Click to Export" include_="retail_data"
      filename_="{@downloadname}" require_="{@target_selection='data'}"
      invmode_="hide"/>
    </layout>
  </layout>
</dynamic>
Discussion
Using the render functionality is a convenient way to get certain QuickApp widgets into various file formats. As a QuickApp developer, it is usually a good idea to give your users options. Since both Excel and CSV file formats are supported by render, it makes sense to give the user the option to select which file format they want to download. You can provide further flexibility by allowing them to decide which of the available widgets should be included in the render as well.
In this recipe, the user is provided this functionality by parametrizing a few values. First,
create a variable based on the file format selection that will be made available to the
render button. However, you must consider that not all render targets support the same
widgets. For instance, the Excel render target supports charts, while the comma-separated
list target (data) does not. So while you have given the user the ability
to select the target type, you also want to avoid providing options that aren't applicable.
Therefore, it makes sense to only allow the selection of a widget if the render target
selection supports that type.
As you can see from the tab panels in this example, there are only two types of widgets: a grid and two charts. If the user selects the Excel target, you want to give them the option to select any number of the widgets in the tab panels. If the user selects the CSV target, only one widget in this example is supported by that target. Therefore, you only give the user the option to select the grid widget when CSV is selected.
This can all be accomplished with two variables, which are initialized in the opening tag of the
<dynamic> element. The target_selection variable
holds the value that is passed to the target_ attribute in the render
button to convey which type of file should be created. The widget_selection
variable holds the list of widgets that the user wants to include in the render. By using a
<do> statement that begins when a widget selection is made, you can
assign values of 0 or 1 to each widget based on the widget_selection
contents to determine which widgets should be included or excluded from the downloaded file.
The require_ attribute is used to ensure that the widget selection
drop-down list is only available when the target_selection variable holds
the value xlsx, and the individual widgets are only available when the user
selects them. And finally, the invmode_ attribute is used to hide each
widget when the require_ attribute is false.
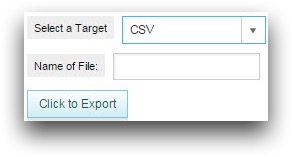
A third variable, filename, can be included to give the user the option to name
the output file. The widget with attribute class_="field" creates a text
box that stores the user's input in the created variable. If no filename is entered, it will
automatically be named download.xlsx or
download.csv, depending on the render target chosen.
If an Excel sheet is needed by the user, you can create further adaptability by generating two
different render buttons, one for exporting all widgets to a single worksheet and one to
render each widget on a different worksheet. The button to render on a single worksheet uses
the include_ attribute to include all of the widgets stored in the
widget_selection variable. Not including this attribute in the button to
render to multiple worksheets causes all of the widgets selected to be exported to their own
worksheet. This is the default behavior.

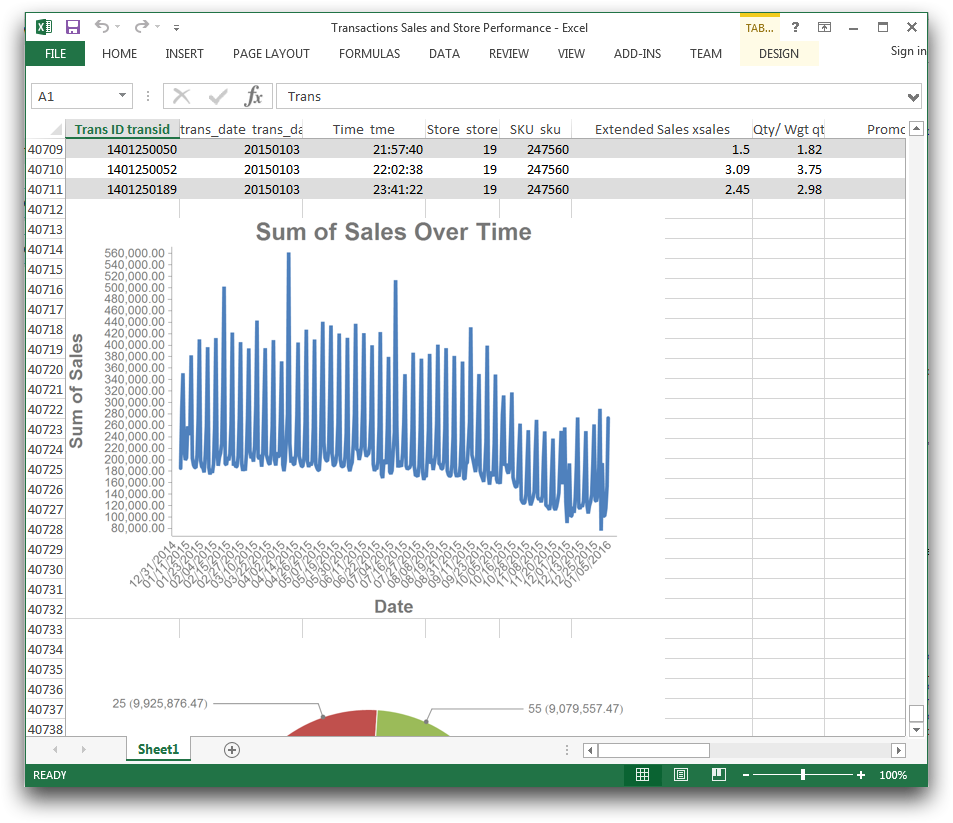
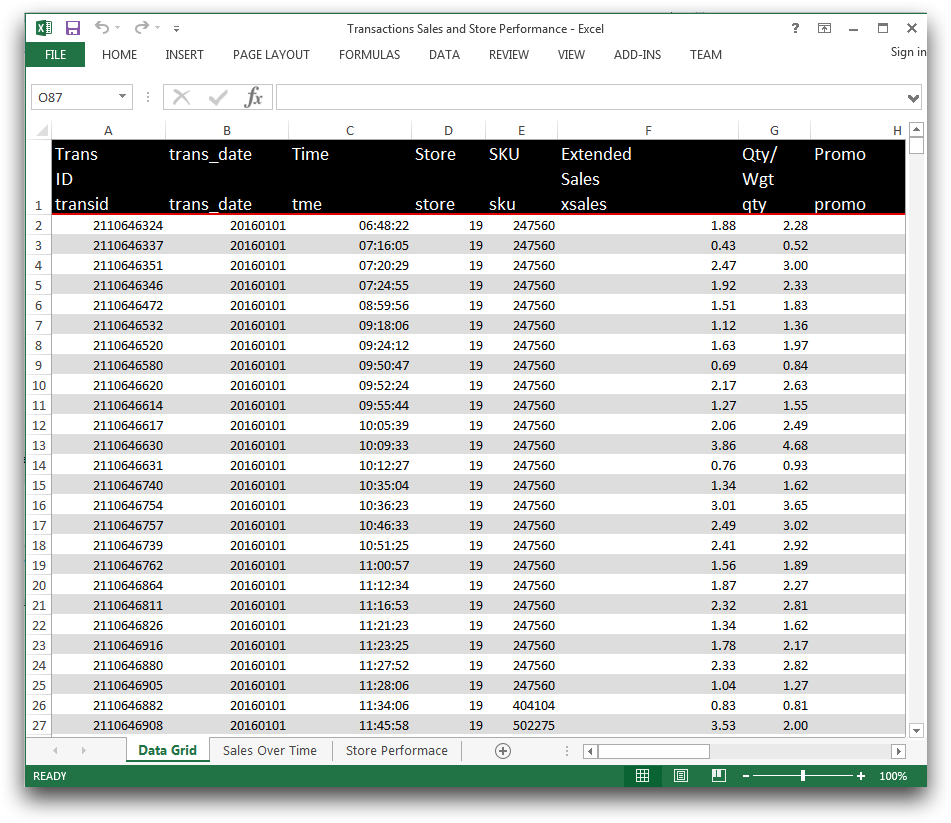
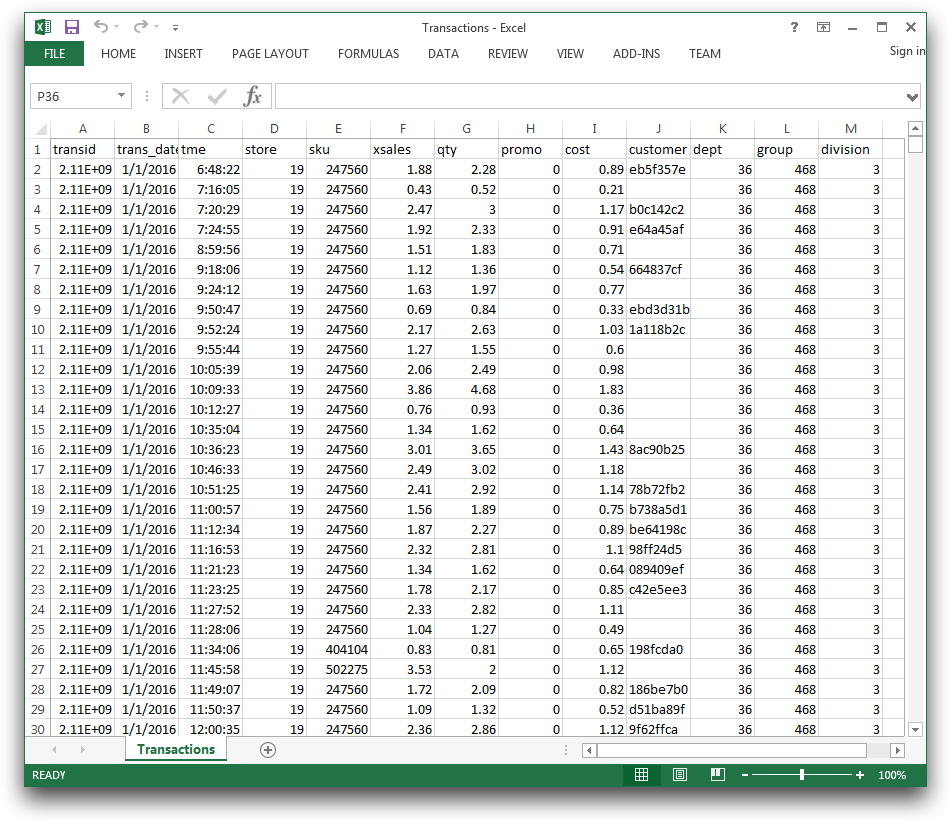
After the user makes their selections, clicking the render button will download a file in the specified format with the supported widgets selected by the user. If the Excel target is chosen, all selected widgets will appear in the specified number of worksheets. If CSV is chosen for the target, only the information from the grid will appear in the file because charts are not supported in that format.
Option 1: Single Excel worksheet
Option 2: Multiple Excel worksheets
Option 3: CSV file
Common errors
- Unknown target_ for render
- While initializing the
target_selectionvariable and thewidget_selectionvariable in<dynamic>, a default value is required fortarget_selection. If one is not provided, you will receive this error.This occurs because render cannot function without a specified target, while if nothing is stated for
include_, all widgets will simply be included. Solving this error is as simple as providing a default of eitherxlsxordatawhen the variable is declared. However, keep in mind that if the default isdata, the widget selector will be hidden due to theinvmode_="hide"attribute.
- Rendering Workbook failed (Too many rows and/or columns).
- Another possible error occurs when you attempt to download a table that exceeds the
allowable size limit. When this occurs, this message will pop up.
To avoid this error, be mindful of the size of your data and try to use selections to only obtain the necessary information.
Further reading
If you would like to learn more about the functions and operations discussed in this recipe, click on the links below: