Configure single sign-on (SSO)
Use the SSO options in the JDBC driver to authenticate to 1010data with single sign-on.
Many organizations use single sign-on to authenticate to different software systems. The following steps assume some familiarity with the single sign-on provider of your organization. If you have questions about getting started with single sign-on, please contact your 1010data account manager.
To set up the JDBC driver for single sign-on (SSO) access to 1010data with the Tableau Connector:
-
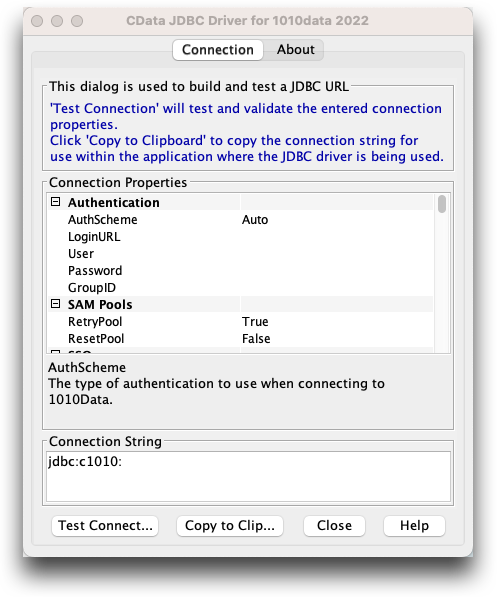
In C:\Program Files\Cdata\CData JDBC Driver for 1010data
2022\lib (Windows) or Applications/CData/CData JDBC
Driver for 1010data 2022/lib (macOS), double-click
cdata.jdbc.c1010.jar.
The CData JDBC Driver for 1010data 2022 screen appears.
-
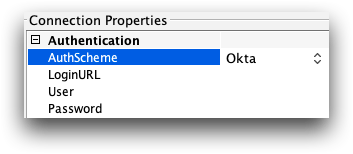
In the Authentication section of the
Connection tab, for the
AuthScheme field, select your SSO provider from the
drop-down list.
-
Scroll down to the SSO section in the
Connection tab of the JDBC Driver.
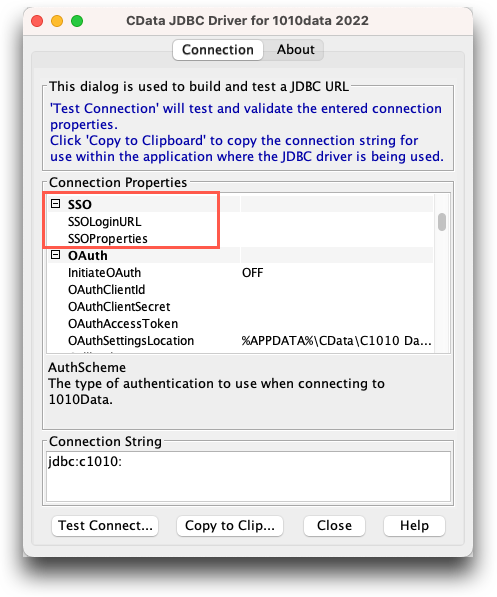
-
In the SSO Login URL field, enter the URL for accessing
the SSO portal for your provider.
- ADFS
- The URL must be the base URL of your Active Directory (ADFS) instance, such as https://ff.myorg.com.
- Okta
-
The URL entered here must be the Okta application embed link. This information is available in the Embed Link field within the application's settings in Okta. Most likely, you will need to contact your Okta administrator for the URL to enter here.
Okta administrators can refer to the following for reference: https://help.okta.com/en/prod/Content/Topics/Apps/Apps_Apps_Page.htm#Show
-
In the SSO Properties field, enter any additional
properties required to connect to the identity provider in a semicolon-separated
list.
- ADFS
- This property is not required.
- OKTA
- There are two optional properties.
Domainis the Okta domain you are signing in with, if it is different from SSO Login URL.APITokenis your Okta API token. In most cases, it is unnecessary. See SSO Properties for more details.
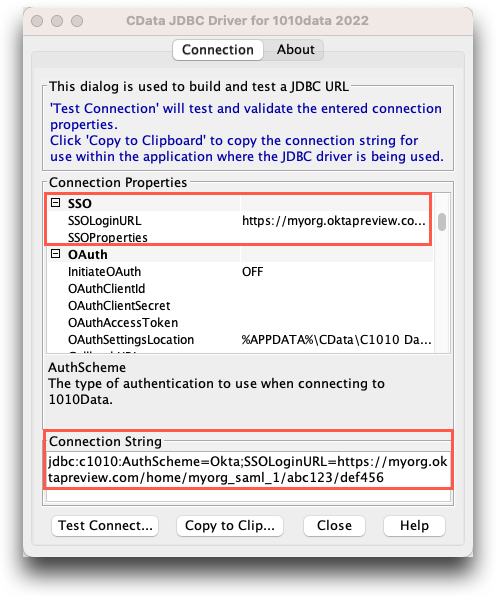
Your CData JDBC Driver for 1010data 2022 now looks similar to the following:Okta example:
Active Directory (ADFS) example:
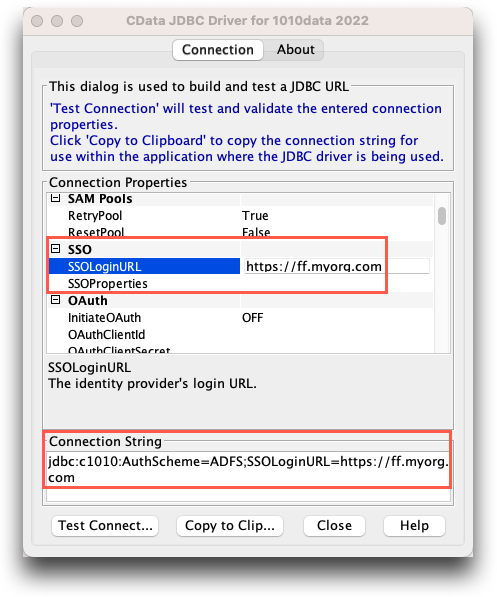 Note: The Connection String text box contains information about the connection. This information will be copied and pasted into the 1010data by CData dialog of Tableau.
 - Click Copy to Clipboard to copy the connection string.
- Click Close.
-
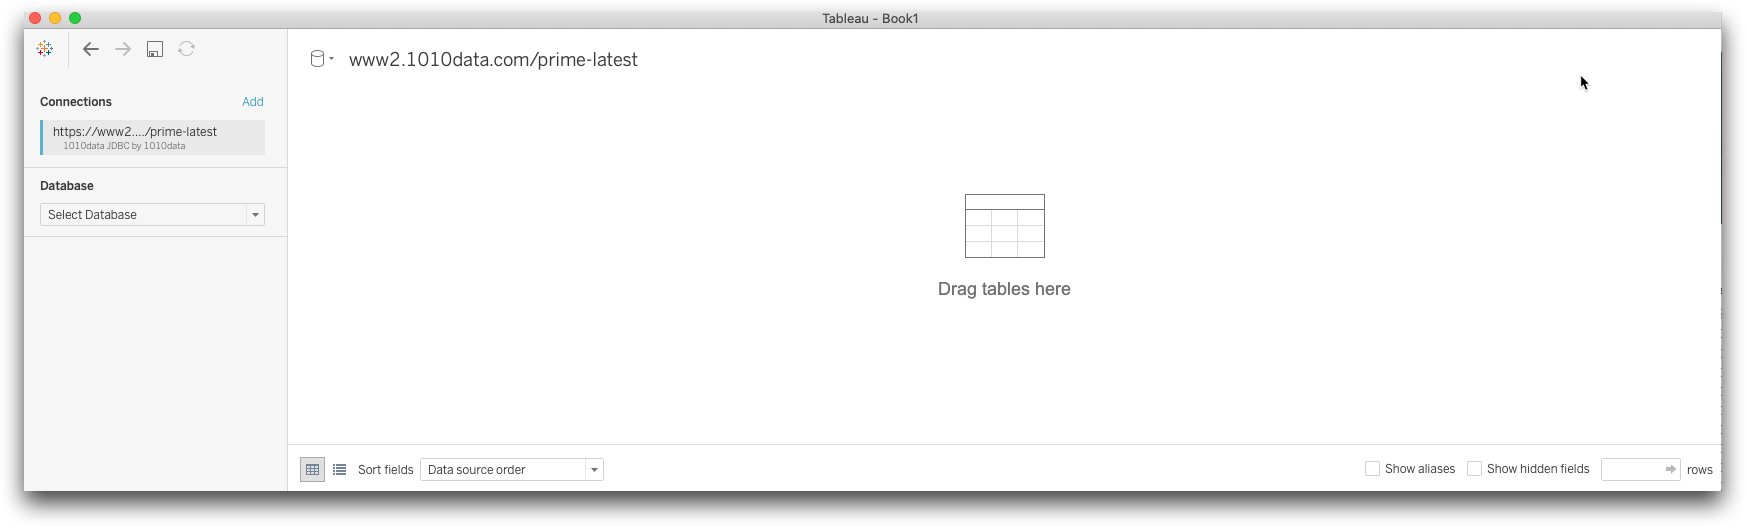
In Tableau, start a connection to 1010data by
CData.
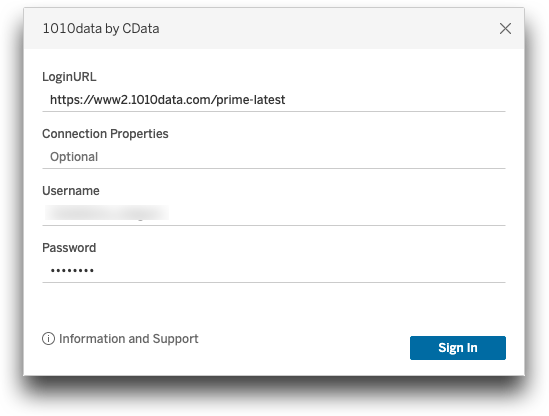
The 1010data by CData dialog appears.
-
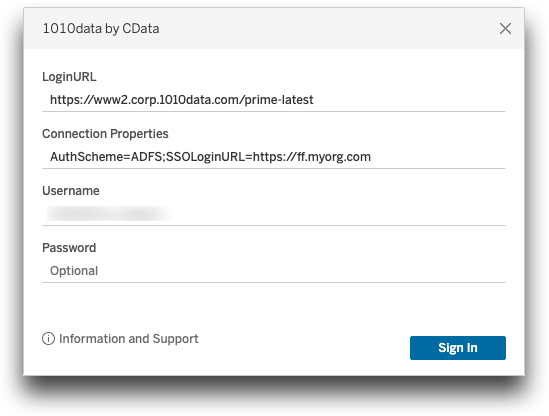
Under Connection Properties, paste the connection string
you created in the JDBC Driver.
Note: Delete jdbc:c1010: if it appears as a prefix in the pasted Connection Properties section.You will see the connection string you built in the JDBC Driver screen, containing the SSO information.
 Note: The next time you sign in to 1010data by CData, Tableau will remember the Connection Properties you set.
 -
Enter your user credentials and sign in to Tableau.
Note: Log in with your SSO user name and password.If your connection is successful, you will see your connection on the Tableau screen.