
Link in a worksheet
Linking in a worksheet allows you to perform various actions on a table and then link the results into an existing table or worksheet.
What if you wanted to modify the Product Master table and link those results into the Sales Item Detail table? You might do this because you only want to link in additional information for a subset of the data. For example, in this tutorial you only want to link in the additional product information for items in the snacks department. You can accomplish this by selecting the rows corresponding to that department in the Product Master table and then using the Link in Another Worksheet option to add the data to the Sales Item Detail table. In this example, you are working with only 35 rows of data. However, for tables with billions of rows, linking in only the additional information you need is more efficient and can result in quicker processing.
To link in a worksheet:
-
Open the Product Master table
(pub.demo.retail.prod).
1010data opens the Product Master table.
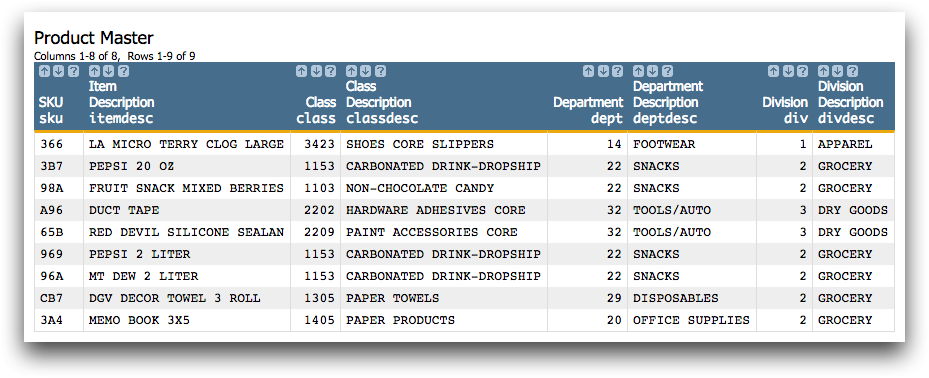
The Product Master table contains products from a number of departments. Perhaps you only want to see the results for department 22. Start by selecting only the rows from that department.
-
In the Department column, right-click any of the
instances of the value 22 and choose
Select rows where Department has the value 22 from
the menu.
Because the original Product Master table has been modified by the row selection, it is now considered a worksheet. The worksheet has four rows.
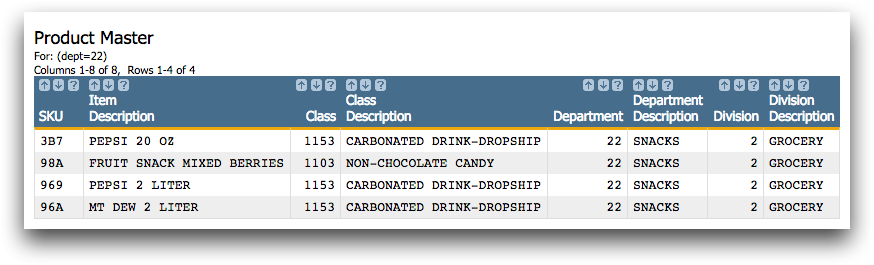
This worksheet can now be linked into your Sales Item Detail table in its current form.
-
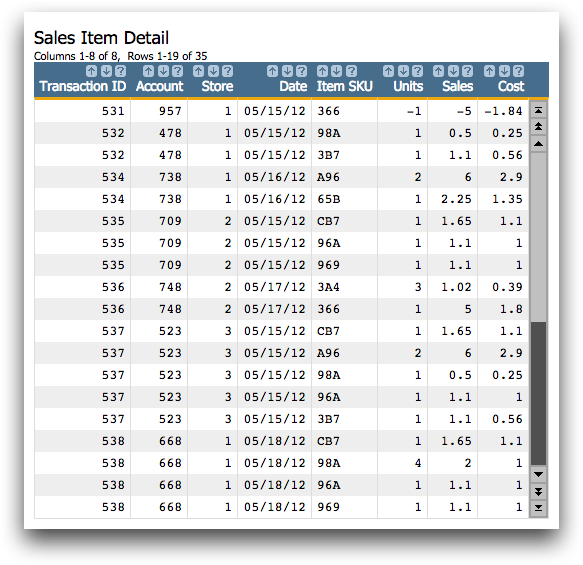
Open the Sales Item Detail table
(pub.demo.retail.item).
1010data displays the Sales Item Detail table.
-
Click .
1010data displays the Link in Another Worksheet dialog.
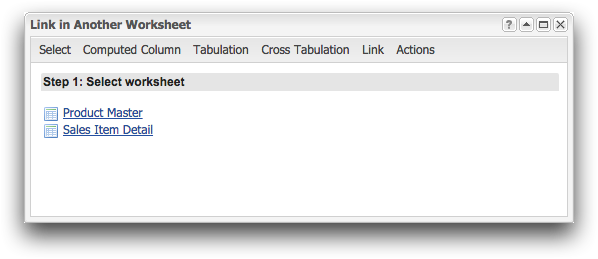
This dialog lists any worksheets you currently have open. In this case, you want to link in the Product Master worksheet that you just modified.
-
Under the Select worksheet section, click the
Product Master link.
1010data displays the Select columns section in the dialog.

Just like when you linked in the original Product
Master table in Link in a table,
link once more on the SKU columns and provide the
_pm suffix.
-
In the Suffix field, enter _pm.

-
Click Submit.
1010data links the Product Master worksheet into the Sales Item Detail table.
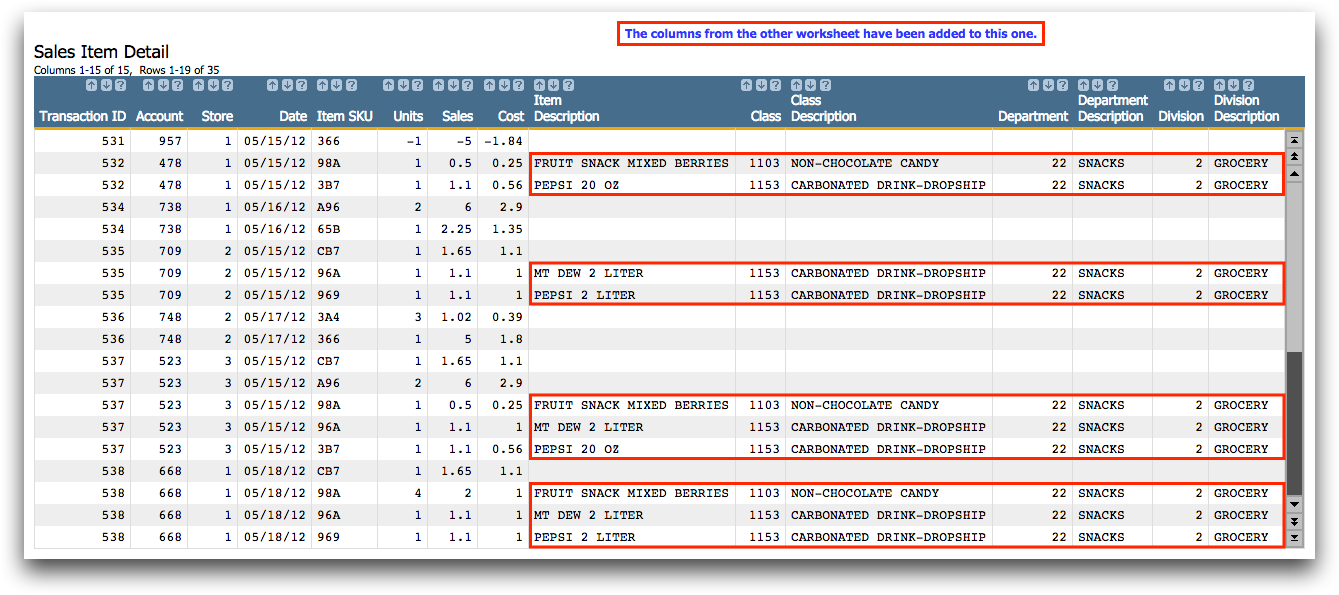
The result is a new worksheet that has information from the Product Master worksheet only for those item SKUs that fall under department 22. However, the other rows in the Sales Item Detail table remain, and the columns from the Product Master worksheet are left blank for items not in department 22. This is useful if you want to look at additional information about one subset of rows in a table or worksheet but still maintain the original level of detail for the other rows.