By performing a link and select, you can include only those rows that have
corresponding matches in the foreign table or worksheet, thereby eliminating the need to do
a subsequent row selection after the link.
The process to link and select rows is nearly identical to the process of simply
linking to another table or
worksheet. The only
difference is the results produced. Instead of applying the information from the
foreign worksheet to the entire base table or worksheet, Link and Select
Rows retains only those rows in the base table that correspond to
the selection in the foreign table.
For instance, what if in the Link in a worksheet tutorial, you only
wanted to see SKUs in the base worksheet that are in department 22? Since department
information does not exist in the base table, you cannot make that selection. You
could first link in the Product Master as the foreign table
and then perform a row selection. However, that requires first linking in more rows
than you need, which is less efficient. The best solution is to first select the
rows in the Product Master table, then perform a link and
select to eliminate the rows in the base table that cannot be linked.
To link and select rows:
-
Open the Product Master table
(pub.demo.retail.prod).
1010data opens the
Product Master table.
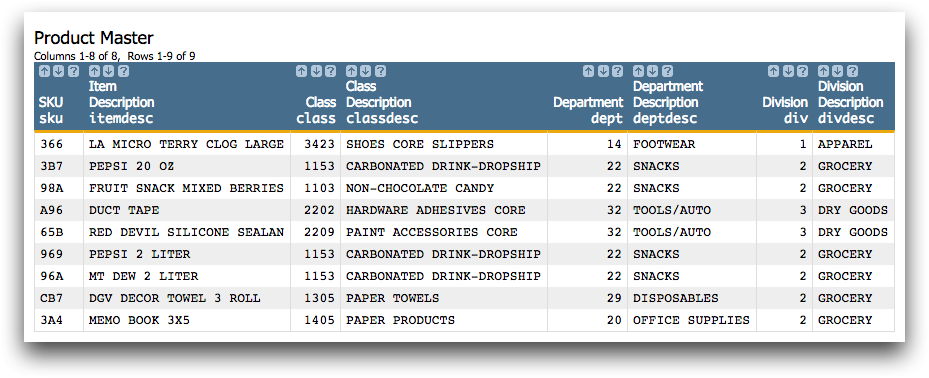
As in Link in a worksheet, start by
selecting only the rows from department 22.
-
In the Department column, right-click any of the
instances of the value 22 and choose
Select rows where Department has the value 22 from
the menu.
Because the original
Product Master table has been
modified by the row selection, it is now considered a worksheet. The worksheet
has four rows.

The link and select rows
operation can now be used to link the worksheet into your Sales
Item Detail table in its current form.
-
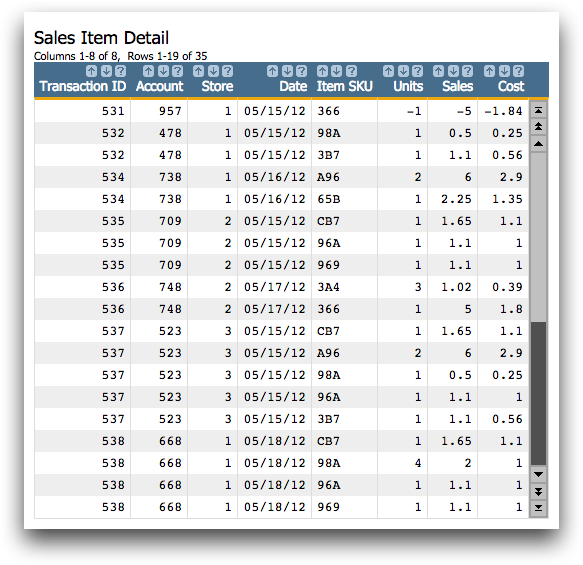
Open the Sales Item Detail table
(pub.demo.retail.item).
1010data displays the
Sales Item Detail table.
-
Click .
1010data displays the
Link and Select Rows
dialog.
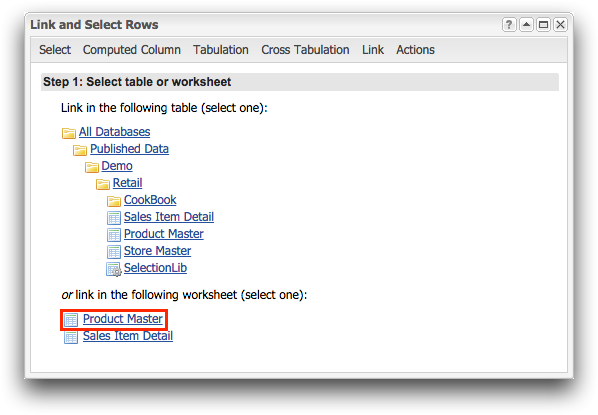
This dialog is almost identical to the
Link in Another Worksheet dialog, except that you
are given the option to link in another table (one that had not been
modified) or a currently open worksheet. In this tutorial, you want to use
the open Product Master worksheet, in which rows
containing department 22 are selected.
-
Under the Worksheet section, click the
Product Master link.
1010data displays the
Select columns section in
the dialog.
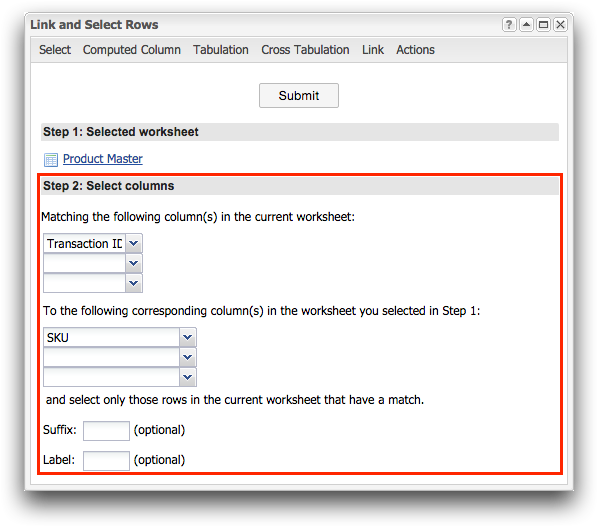
Just like when you linked in the original Product
Master table in Link in a table,
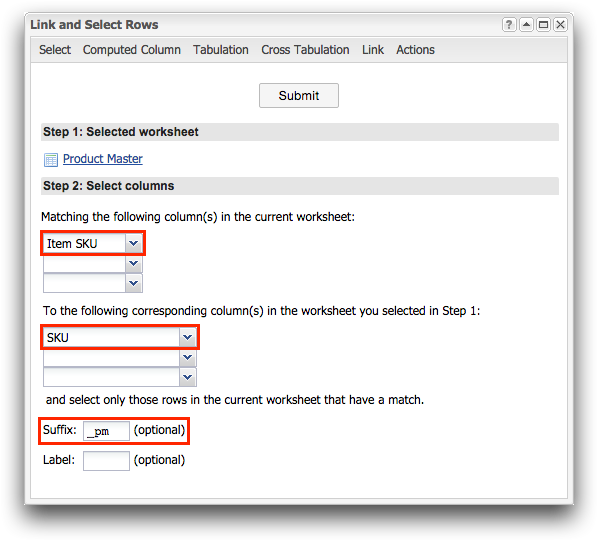
link once more on the SKU columns and provide the
_pm suffix.
-
Select Item SKU from the first drop-down list.
-
In the first drop-down list under the Corresponding
Column(s) section, select SKU.
-
In the Suffix field, enter
_pm.
-
Click Submit.
1010data links the
Product Master worksheet into
the
Sales Item Detail table.
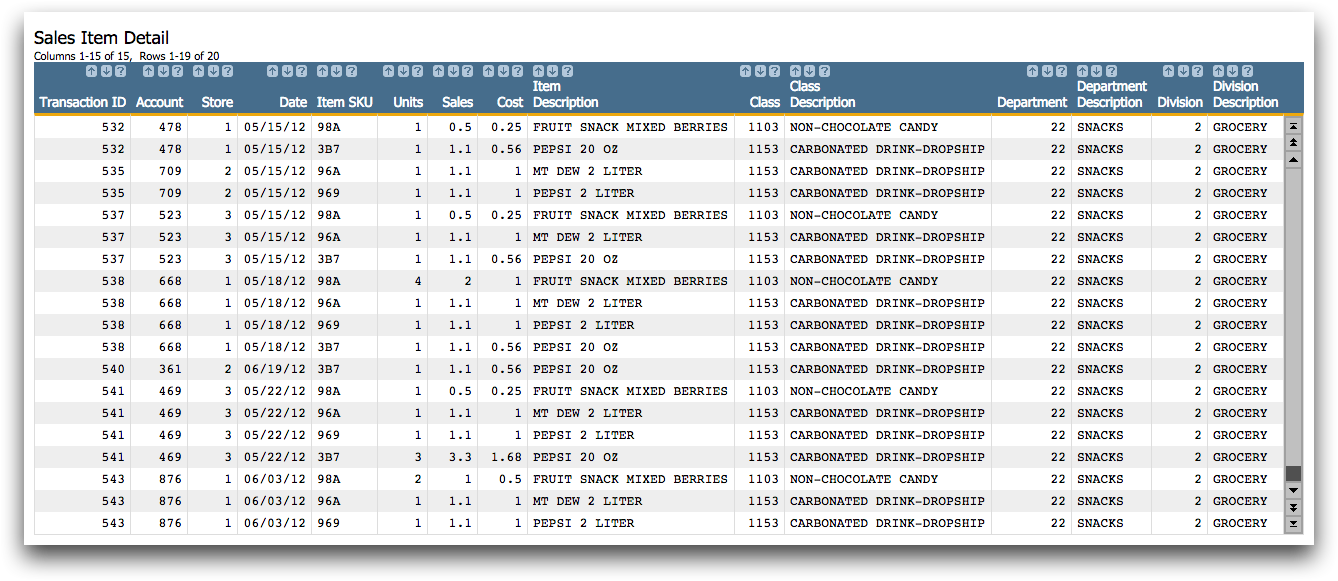
The result is a new worksheet
with only the rows from the Sales Item Detail table
that have SKUs in department 22, reflecting the selection from the
Product Master worksheet. Only rows left in the
Sales Item Detail worksheet are those that apply
to the initial selection you made in the Product
Master worksheet. This method allows you to use links more
efficiently and effectively in your analyses.
-
When you are finished with this tutorial, close both the Product
Master and the Sales Item Detail
worksheets.
The linking tutorials are intended to introduce you to the topic of linking, but it
is a complex topic with many variations, which makes it very powerful. Finding ways to
combine data sets and provide them with context is what 1010data is all about. After
reviewing these tutorials, take some time to explore tables and see if they have places
where they can be joined by columns with similar information. This will help you
understand how your data is interrelated, and start you down the path of deeper, more
insightful analysis.


