
Edit a Quick Query
You can perform certain tasks on an existing Quick Query. For example, you can view and edit details of a Quick Query, run it, and add it as a favorite.
To take this tutorial, you must have completed the Save a Quick Query tutorial.
To edit a Quick Query:
-
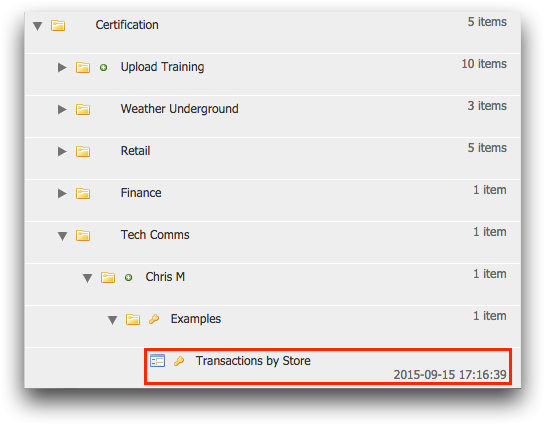
In the Folders and Tables browser, navigate to the
folder where you saved your Quick Query.
1010data displays your saved Quick Query.
-
Double-click the Transactions by Store Quick Query to
run it.
1010data runs the Transactions by Store Quick Query and prompts you to enter a store number.
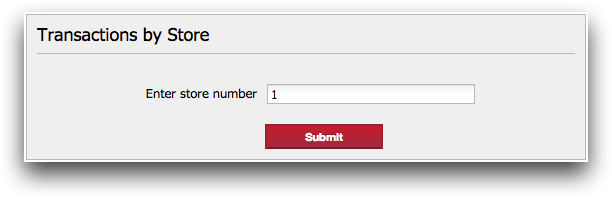
The value that you specified in the original query for the store number is listed with the descriptive prompt you specified.
Next, find out what transactions were from store 3.
-
Enter 3 in the Enter store number
field and then click Submit.
Note: You can run the Quick Query for more than one store by entering a space-separated list of store numbers.1010data displays the results of your Quick Query.
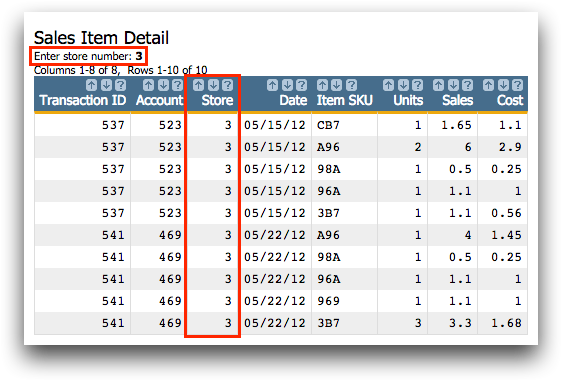
As you can see, 1010data ran the query and presented only the sales information for store 3.
-
Click the Unfold (
 )
icon.
1010data displays the Folders and Tables browser.
)
icon.
1010data displays the Folders and Tables browser. -
Select the Transactions by Store Quick Query by
single-clicking it.
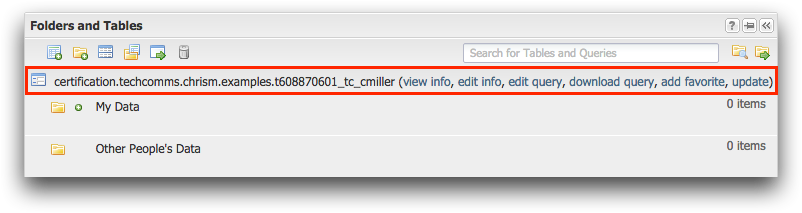
1010data highlights the Quick Query in blue and displays the full path below the Folders and Tables toolbar. In addition, a list of actions you can perform are displayed.
-
In the list of actions below the Folders and Tables
toolbar, click View Info.
1010data displays detailed information about the selected Quick Query.
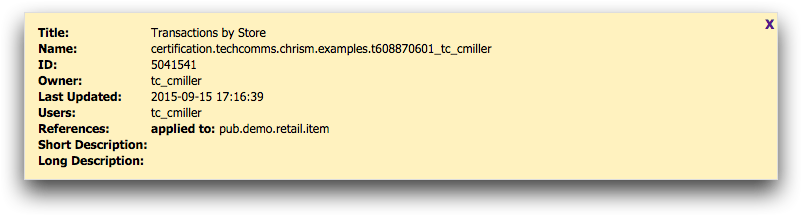
Detailed information about the Quick Query includes the title, which you set when you created the Quick Query; the name and full path to the Quick Query; the owner; and the users who have permission to use the Quick Query. The Users field is discussed and used later in Share a Quick Query. Finally, the References field displays the name of the table this query will be applied to, which in this case is the name of the Sales Item Detail table (pub.demo.retail.item).
-
Click the Close (
 ) icon.
Next, you will learn how to edit your Quick Query to provide more flexibility. Instead of specifying just one store, you can edit your Quick Query to accept a qualifier when it is run. For instance, you might want to see the transactions for every store except the store you specify.
-
In the list of actions below the Folders and Tables
toolbar, click Edit Query.
The Save As a Quick Query dialog is presented with all the information for the current query.
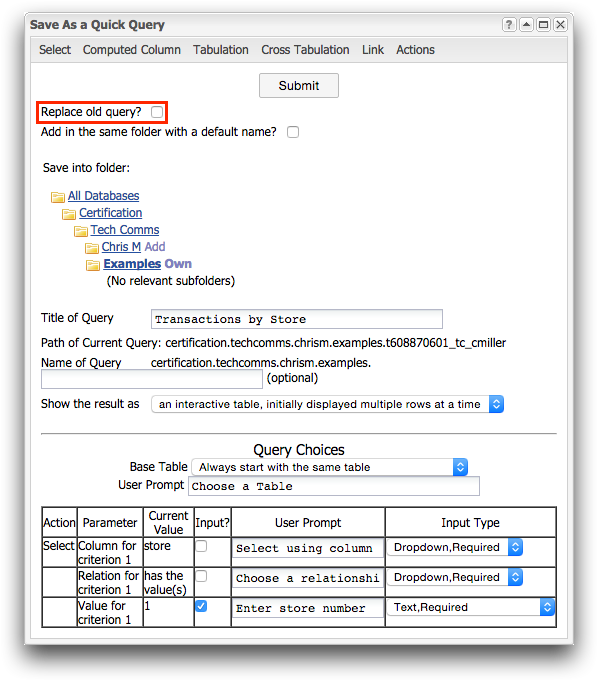
The dialog is almost identical to the one you originally completed, but it now has a Replace old query checkbox. If this checkbox is selected, the original query is replaced when you click the Submit button.
Note: Running an existing Quick Query and then clicking Save As Quick Query from the File menu is different from editing an existing Quick Query. If you ran the Quick Query you just created and then clicked Save As Quick Query from the File menu, 1010data displays the Save As a Quick Query dialog.This dialog is different from the dialog you used to save your original query; there is no criteria listed under Query Choices and there is no Replace old query checkbox. In essence, this creates a new Quick Query based on the results of running your original Quick Query.
Change the title of the Quick Query to reflect that you may be looking at transactions from more than one store.
-
In the row of the table associated with the Relation for criterion
1 parameter, select the checkbox in the
Input? column.
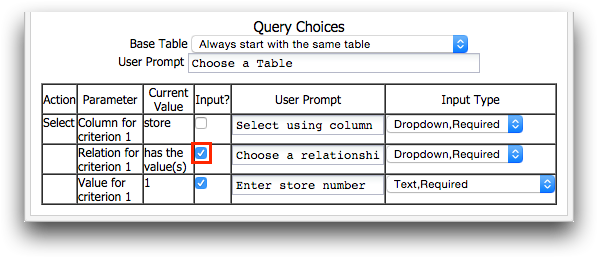
This option allows you to choose a relationship for the input when the Quick Query is run.
-
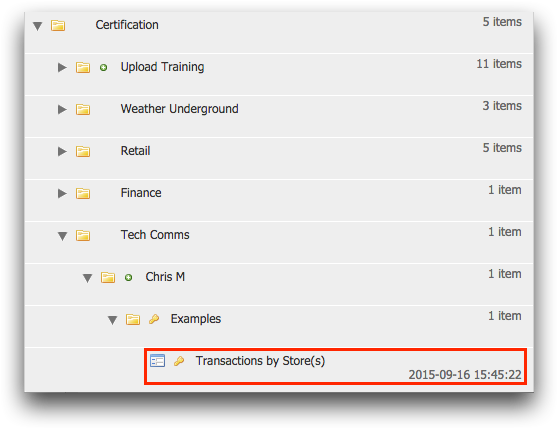
Return to the Folders and Tables browser and locate your
Quick Query.
You can see from the changed title that your modified Quick Query replaced the original in your user folder.
 Note: To see the changes, you may need to close the folder containing the Quick Query by clicking the Collapse (
 ) icon to the left of the folder and then reopen it by clicking the
Expand (
) icon to the left of the folder and then reopen it by clicking the
Expand ( ) icon.
 -
Double-click the Transactions by Store(s) Quick Query to
run it.
1010data runs the updated Transactions by Store(s) Quick Query.
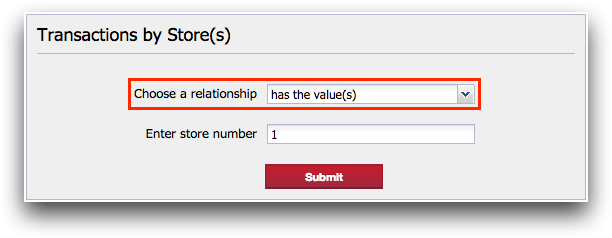
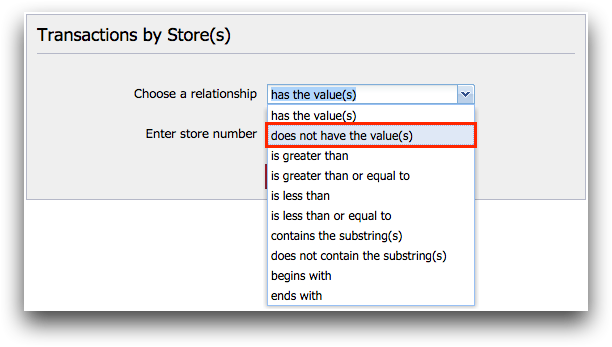
The updated Quick Query prompts you to select a relationship in addition to a store number.
Provide the criteria to your Quick Query to find the transactions for every store except store 1.
-
Select does not have the value(s) from the
Choose a relationship drop-down list.
-
Enter 1 in the Enter store number
field and then click Submit.
Note: You may not need to change the store number because 1 is the default value.
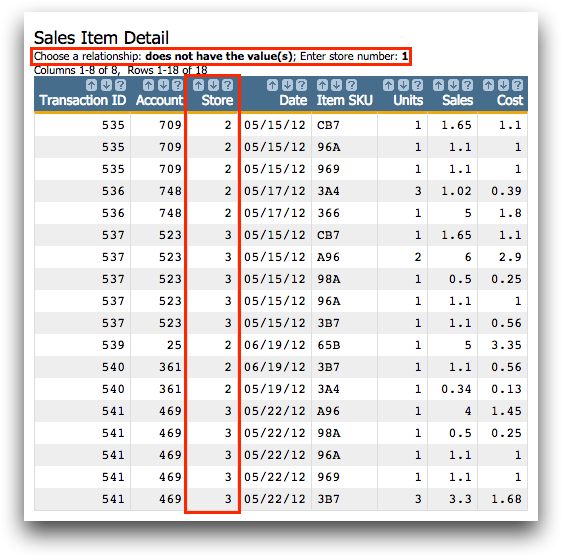
1010data displays all of the transactions for every store except store 1.
Since your Quick Query is so useful, add it to your list of favorites on the Start Page.
-
In the list of actions below the Folders and Tables
toolbar, click Add Favorite.
1010data adds your Quick Query to the Favorites section on the Start Page.
 Note: To remove a favorite, click the Remove Favorite (
 ) icon next to the item you want
removed.
) icon next to the item you want
removed.Now, all you have to do is click your Quick Query on the Start Page to run it.