
Save a Quick Query
A Quick Query is a saved query that can be reused. When saving a Quick Query, you can save it exactly as it is, or you can parameterize it for added flexibility and usefulness.
At some point, you may find yourself running the same query over and over. Rather than rebuilding the query from scratch each time you want to run it, you can save it as a Quick Query. A Quick Query can run on tables that change over time without needing to change the query itself. In addition, you can parameterize the query so that when it is run, the Quick Query will prompt you for values that you provide. For example, rather than always obtaining sales data for one particular store, you could specify any store in the chain.
In this tutorial, you start by building a query to find all of the transactions for store 1. Then, you save the query and parameterize it so that when it is run, you can obtain sales data for any store in the chain. The query will be saved in a folder that you specify. In this tutorial, the location and name of an example user folder is provided for illustrative purposes. As you follow this tutorial, you will use the location and name of a user folder that you have permission to write to.
To save a Quick Query:
-
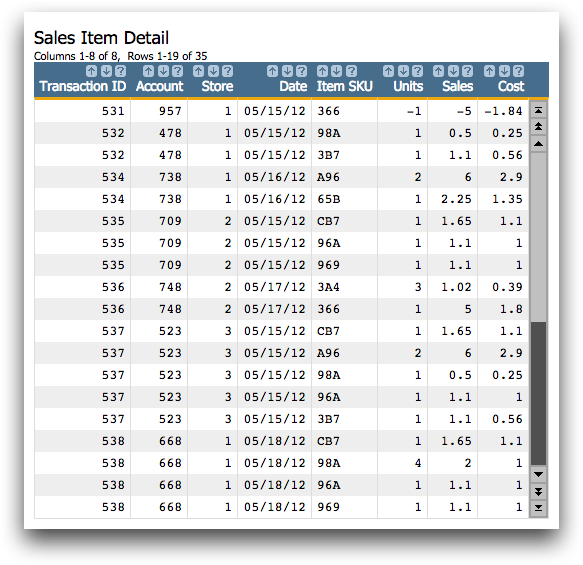
Open the Sales Item Detail table
(pub.demo.retail.item).
1010data displays the Sales Item Detail table.
-
Click .
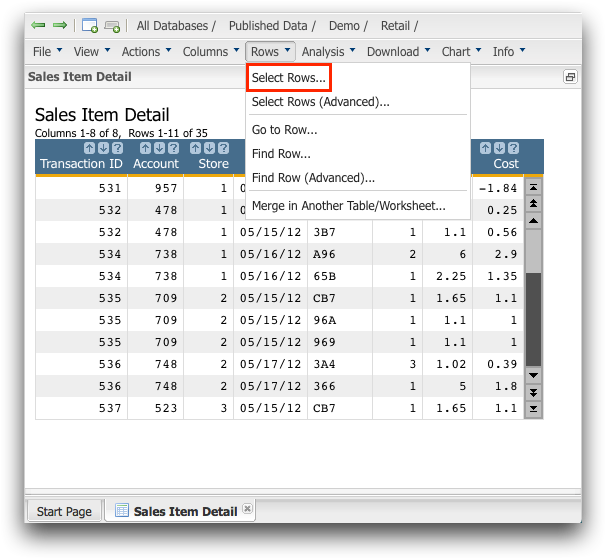 1010data displays the Select Rows dialog.
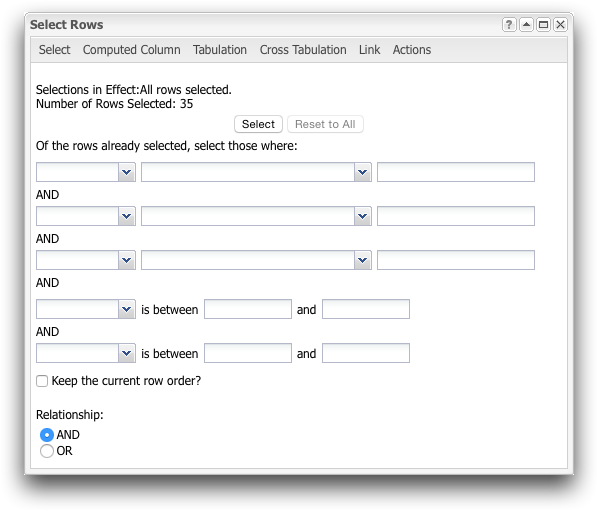
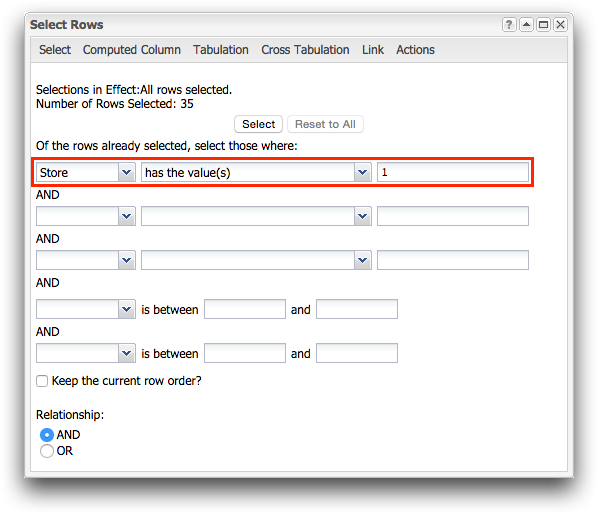
Use the dialog to select rows in the table associated with store 1.
-
Select Store from the first drop-down list, has
the value(s) from the second drop-down list, and enter
1 into the text field on the right.
-
Click Select.
1010data displays the results of your selection.
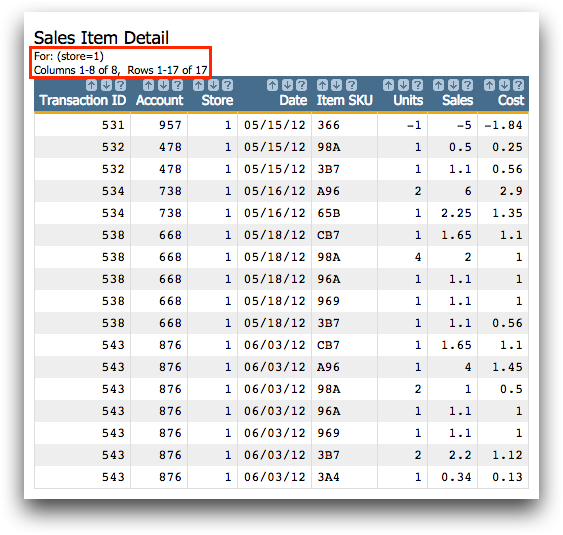 Your worksheet contains the 17 rows from the Sales Item Detail table that are from store 1.Note: At this point, you could save the results as a permanent table. This is helpful if you want to archive the information or if you need this particular table in the future and know the information in it will never change. However, in most cases it makes more sense to save the query instead of a static table. That way, if new data is added to the table, all you need to do is rerun the query. In addition, saving a table takes up disk space. When you work with tables that contain millions or billions of rows, that can add up quickly. The only way to know when you have exceeded your limit is when you receive an error message.
Instead of saving the table, save the current query as a Quick Query with the store value as a parameter, so that you can specify any store (not just store 1) when it is run.
-
Click .
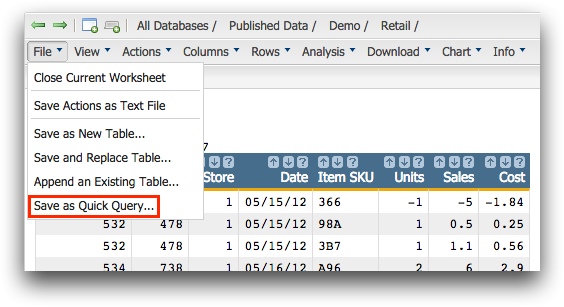 1010data displays the Save As a Quick Query dialog.
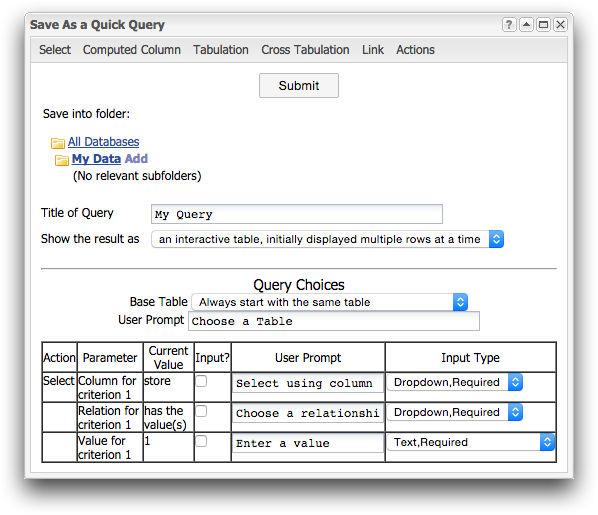 Under Save into folder, browse to the location where you want to save the Quick Query. You can save your Quick Query in folders labeled with Add or Own after the folder name. These labels correspond to the Uploader (
 ) and Owner (
 ) icons, respectively, in the Folders
and Tables browser.Note: Although you can save a Quick Query in your My Data folder, 1010data recommends that you save your Quick Queries in your user folder or one of its subfolders. This is especially important if you want to share access to the Quick Query with other users or user groups. You cannot create subfolders in your My Data folder, which means you would need to give permission to each user for every item in your My Data folder you want to share (in the case of this tutorial, your Quick Query). Another way to share objects in 1010data is explained later in Share a Quick Query.
) icons, respectively, in the Folders
and Tables browser.Note: Although you can save a Quick Query in your My Data folder, 1010data recommends that you save your Quick Queries in your user folder or one of its subfolders. This is especially important if you want to share access to the Quick Query with other users or user groups. You cannot create subfolders in your My Data folder, which means you would need to give permission to each user for every item in your My Data folder you want to share (in the case of this tutorial, your Quick Query). Another way to share objects in 1010data is explained later in Share a Quick Query. -
Click the All Databases folder and then navigate to the
location of the user folder where you want to save the Quick Query.
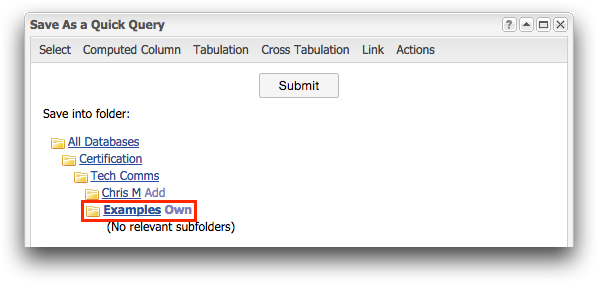 Note: In the image above, the owned user folder, Examples, is used to illustrate this concept. Your folder name and location will be different.
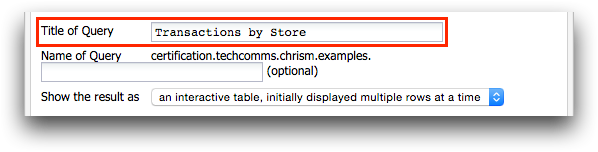
Next, give your Quick Query a descriptive name so that you and others know what it does.
-
Enter Transactions by Store in the Title of
Query field.
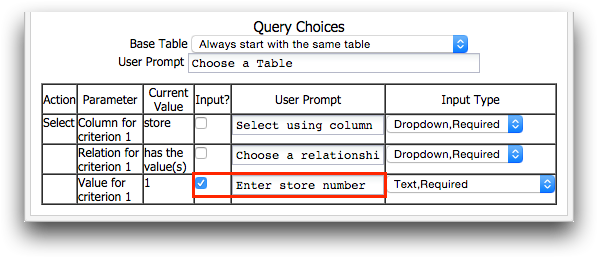
Under the section labeled Query Choices, specify which items will require input when a user runs your Quick Query. In this tutorial, you want the user to be able to enter any value for the store number, not just 1.
-
In the row of the table associated with the Value for criterion
1 parameter, enter the phrase Enter store
number in the User Prompt column.
When the Quick Query is run, this text is displayed so the user knows what information is needed.
Now that you have learned how to create and save a Quick Query, see Edit a Quick Query. This tutorial explains how to perform actions such as running and editing your Quick Query.