
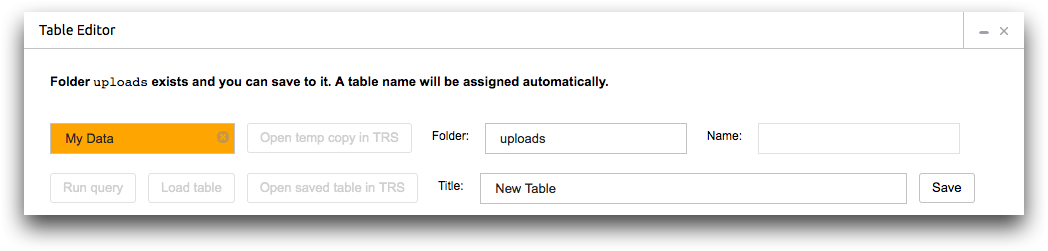
Create a table
The Table Editor allows you to create new tables.
You can create new tables by manually entering data or by pasting copied data from an existing spreadsheet.
To create a new table with the Table Editor.
- In the object browser, navigate to a folder that you have write access to. You can also enter the folder path in the Folder field.
-
Enter a table name in the Table field.
If you don't enter a table name, the Insights Platform automatically assigns one. You cannot enter a table name if you are saving to the My Data folder.
-
Enter a table title.
This is optional, but if you do not enter a table title, the entry for your new table in Object Manager will be blank.
-
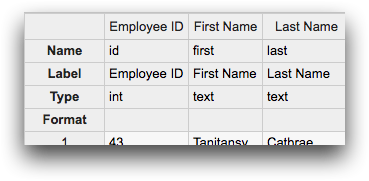
In the table pane, add data to the new table.
There are two ways to add data to a new table. You can manually enter the table data or paste in data that you've copied from a spreadsheet.
-
Right click on the table and select Show Column
Info.
The Insights Platform reveals the column information fields.
-
Enter the column information.
For more information, see Columns.
-
To save the new table, do one of the following:
- Click Save.
- Right-click and select Save table.
-
If you want to view the saved table in TRS, click Open saved table
in TRS.
The Insights Platform opens a TRS window.