
Create a job
Create a new job in the Scheduler.
To create a job:
-
On the right pane of the Scheduler, click the
Basic Info (
 ) icon. For Job Name, enter a
name for your new job.
) icon. For Job Name, enter a
name for your new job.

-
Enter the recipients.

The Enter Recipients field automatically lists your user ID. You can add other 1010data Insights Platform users in your company by entering their user IDs in the field. You cannot enter other email addresses.
-
Click the Base Table and XML (
 ) icon. Select your
table or query from the object browser.
) icon. Select your
table or query from the object browser.
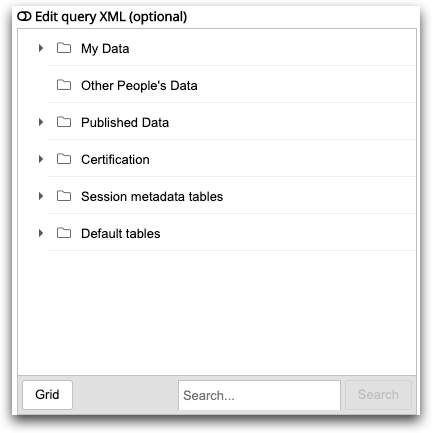
You must select a table. If your query defines the table you want to use, you can select that table, or you can select a default table in the Default tables folder, such as Empty base table or Default base table. The table defined in the query takes precedence over the selected table.
-
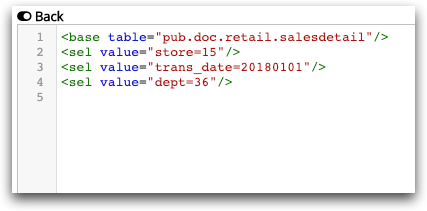
Click Edit query XML (optional) if you want a query to
return specific information from the table.
-
Click the Job Timing (
 ) icon. Choose the
Job Type. You can choose a Job
Type of Regular Frequency or
Dependent Trigger.
) icon. Choose the
Job Type. You can choose a Job
Type of Regular Frequency or
Dependent Trigger.
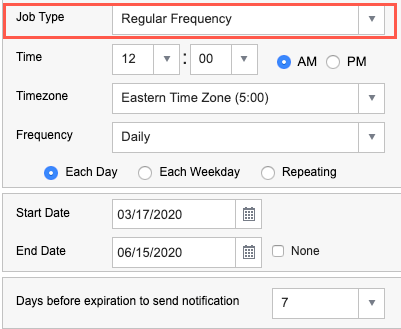
Choose Regular Frequency if you want to run your job at specific intervals, or choose Dependent Trigger if you want your job to run only when another job is triggered.
-
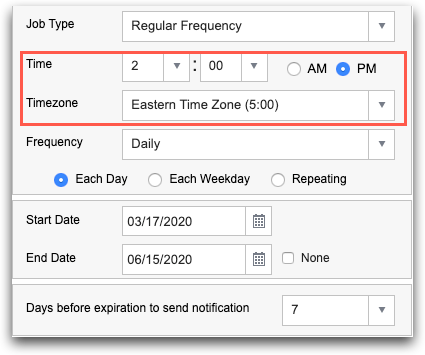
If you chose a Job Type of Regular
Frequency, select the time at which the job should run and the
time zone to use.
-
Choose the frequency of the job.
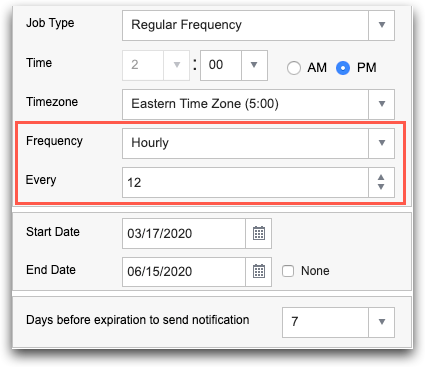
Each frequency option has its own selection options, which are displayed below the chosen option. For more information, see Job Timing.
After you select the report frequency, the Monthly Run Summary section displays the amount of runs the new job will produce for the remainder of the month. For more information, see Monthly Run Summary.Note: Your new job may exceed the monthly number of runs. For more information, see Run limit. -
Choose the time frame for the job.
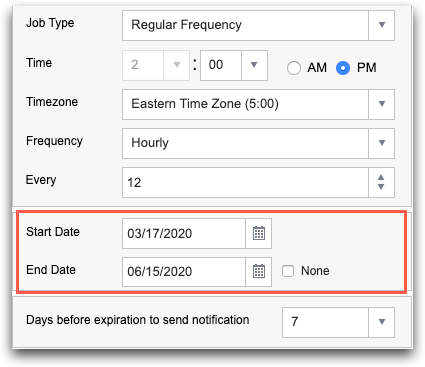
Select None if there is no end date.
- Select the number of days before job expiration to send an email notification to your report recipients, or keep the default number of 7.
-
Click the Output Options (
 ) icon. Select
the format for your results and whether you want to compress your results
file.
) icon. Select
the format for your results and whether you want to compress your results
file.
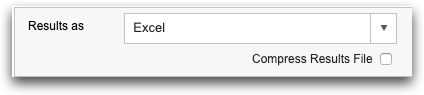 For more information, see Output Options.Note: If either TABLE or QuickApp is selected, you must enter the path of the folder where you want the table or QuickApp saved.
 -
Click the Email Contents (
 ) icon. Enter an optional subject and body of your
email.
) icon. Enter an optional subject and body of your
email.
-
Select whether you want to include the results file in the email, and whether
to include the log file. If you do not include the results file, the email will
contain only a link to the results file.
For more information, see Email Contents.
-
Optional: To schedule multi-jobs, change the version of Insights Platform on
which to run the job, or send warnings that the job is running too long, click
the Advanced (
 ) icon.
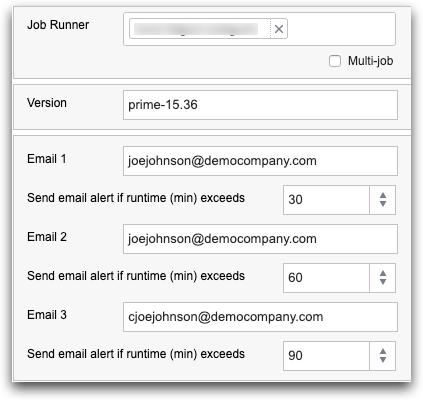
For more information about these options, see Advanced settings.
-
Click Schedule at the bottom of the right pane of the
Scheduler.
You will receive a confirmation message that the job was created. You can view your job in Existing Scheduled Jobs in the left pane of the Scheduler. You may need to click the refresh (
 ) icon.Note: By default, only four jobs can exist for a user at any given time. Delete any inactive jobs in order to create new jobs.