
Job Details
The Job Details section of the Scheduler allows you to create a job, view the details of an existing job, and clone an existing job.
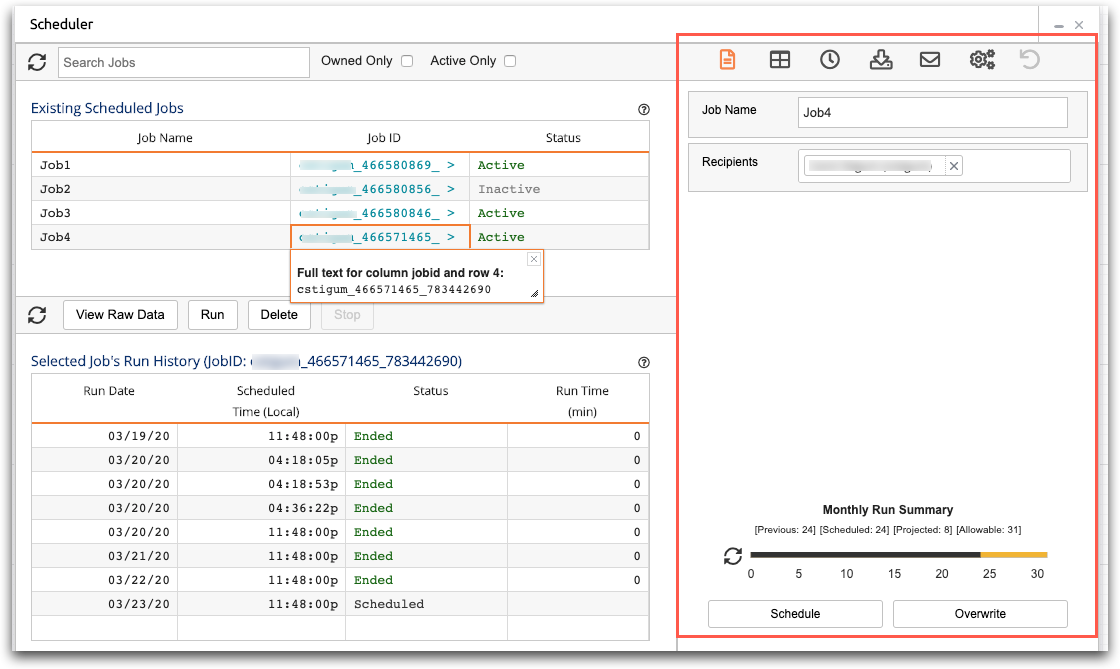
The Job Details section of the Scheduler is divided into the following six detail screens, represented by the six icons in the Job Toolbar:
- Basic Info

- This screen is where you enter the job name and recipients. You can also clone a job
here by selecting an existing job and changing the job name.
For more information, see Basic Info.
- Base Table and XML

- This screen is where you select the table for your job, or create a custom Macro
Language query for your job.
For more information, see Base Table and XML.
- Job Timing

- This screen is where you select the whether the job has a regular frequency or is
triggered by another job, the time of the job, the frequency of the job, and the start
and end dates.
For more information, see Job Timing.
- Output Options

- This screen is where you select the format for your job results. Possible formats
are Excel, CSV, PDF, QuickApp, and Table.
For more information, see Output Options.
- Email Contents

- This screen is where you enter the email options for your job, including the email
subject and body.
For more information, see Email Contents.
- Advanced

- This screen is where you control advanced settings, such as email options for jobs
that have timed out.
For more information, see Advanced settings.
At the bottom of the Job Details section is a Monthly Run Summary. The Monthly Run Summary keeps track of your monthly scheduled and projected job runs. For more information, see Monthly Run Summary.